Registering a personal account with Azure is essential to resolve issues accessing Outlook email.

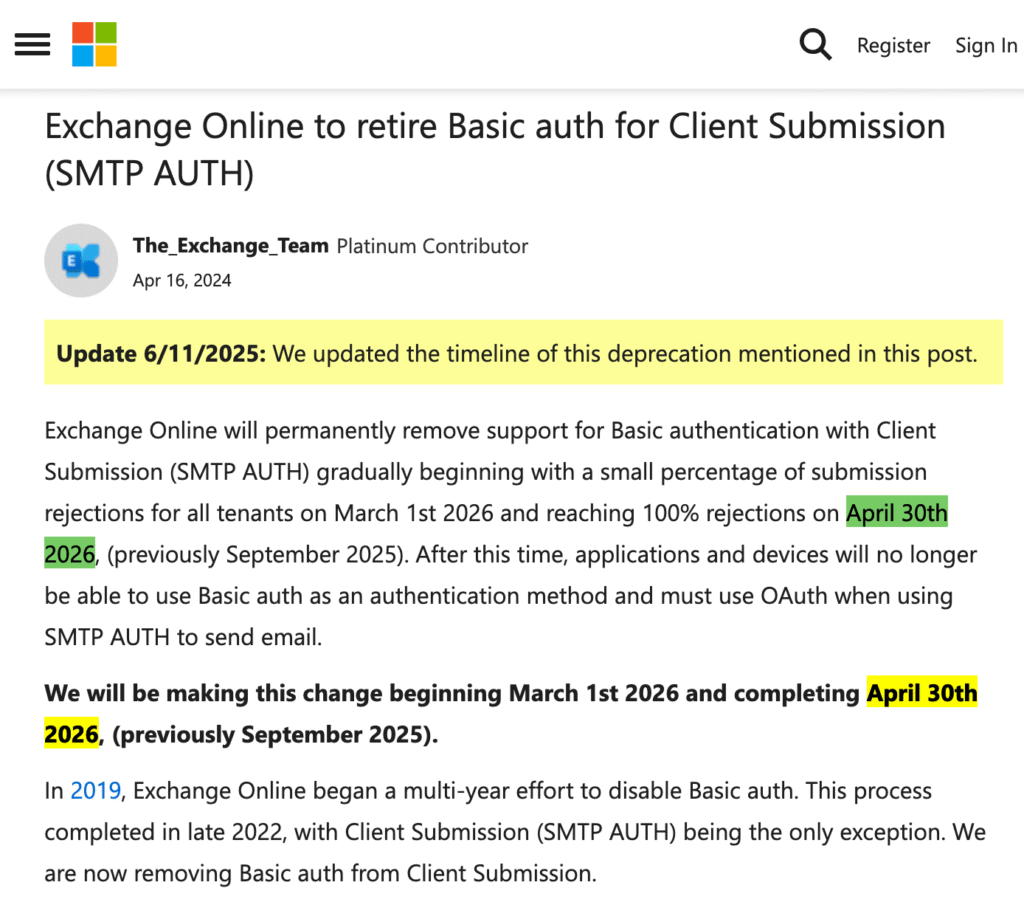
The world-renowned tech giant Microsoft has truly taken a firm stance, vigorously promoting modern secure connection methods for data security reasons. Since 2022, it has phased out basic authentication (username/password) for enterprise email services. In September 2024, it announced that basic authentication for personal users would also be discontinued starting May 2025, though this deadline has now been extended to the end of April 2026.
For users who frequently use Outlook’s website and app, as well as major email clients like Apple Mail and Gmail, there appears to be little impact since these apps already have built-in OAuth2 support. However, those who have long relied on third-party clients or self-hosted tools and accumulated years of email data may find themselves in a bind, forced to take matters into their own hands.
Regardless of which client or app you use, if it doesn’t have Microsoft’s OAuth2 interface built-in, you must first obtain OAuth credentials for your personal Outlook account.
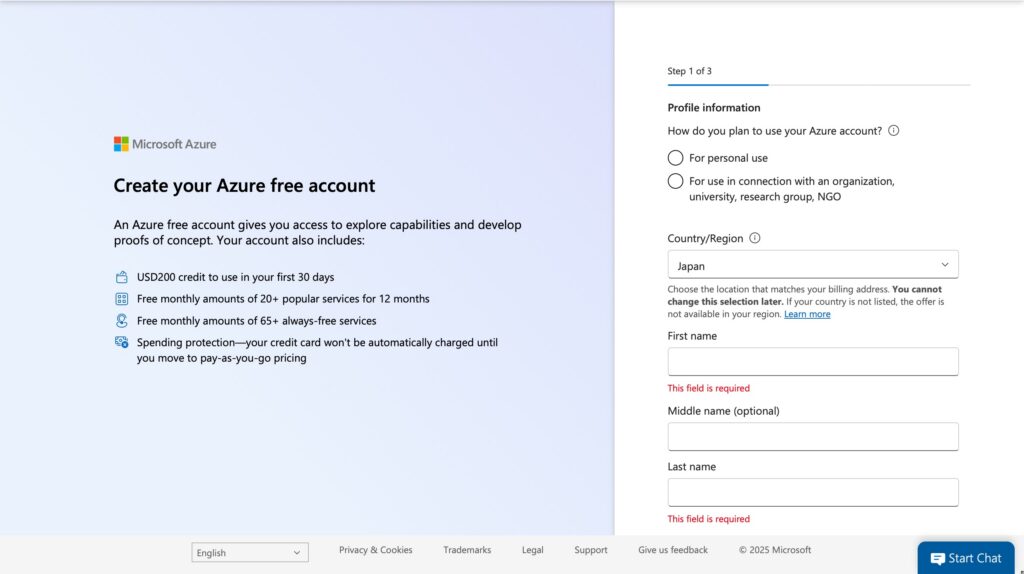
First, you need to register for a free account on Azure, Microsoft’s cloud service platform. For enterprise users, the corporate ID is typically already linked to the corresponding Azure account. Individual users, however, must register anew using the email address associated with their Outlook account.
Please note that during registration, you will be required to verify your credit card. Supported credit cards include VISA, American Express, Mastercard, and JCB.
After completing registration, go to the homepage of the personal management platform and select App Registration. If you don’t see the Application Registration option, you can search for it in the search bar.
On the application registration page, click New Registration, then fill in the application name, account type, and other information. If this account is solely for your personal use, select Single Tenant. Since I have separate Outlook email accounts for work and personal use, I need to choose Multi-tenant and Personal Account.
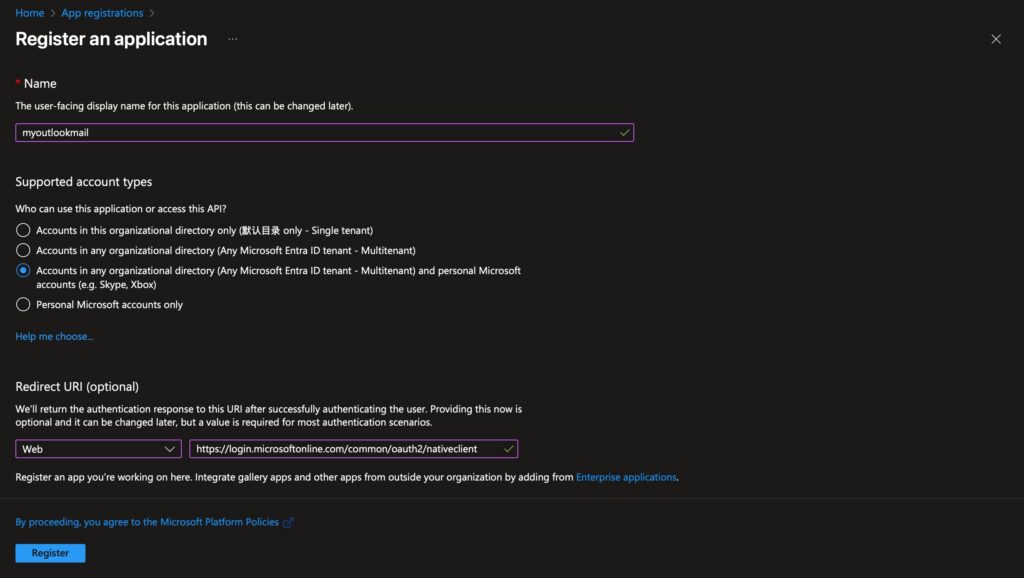
After that, determine the redirect address. Select Web as the method, and the address is
https://login.microsoftonline.com/common/oauth2/nativeclient
This address is a special address whose function is to inform the Microsoft Identity Platform that the application we are currently registering is intended for API authorization.
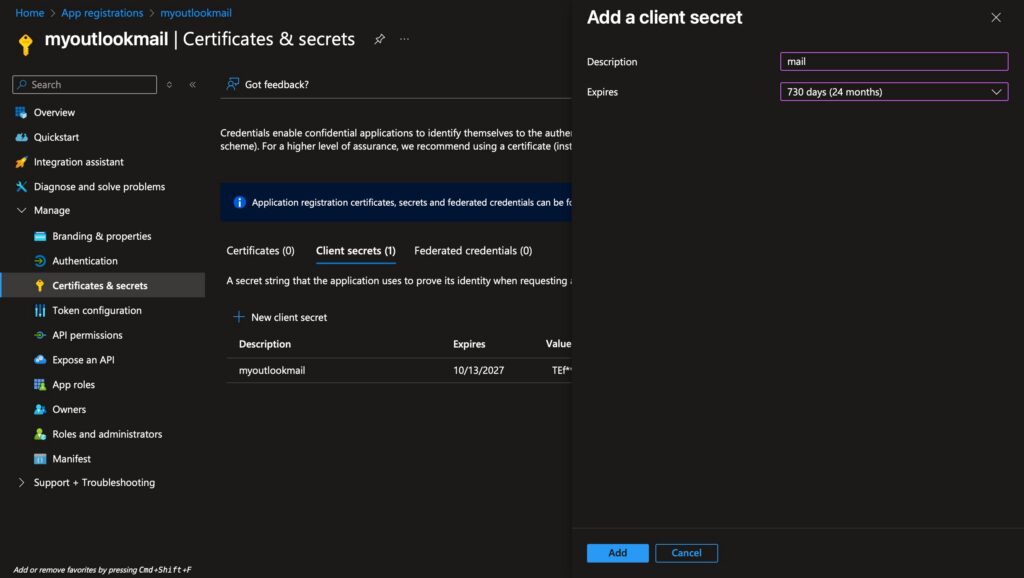
After clicking “Finish,” you’ll arrive at the application details page. Under “Manage” on the left, select “Certificates and Passwords.” Here, create a new client password. You can choose the password’s validity period, with a maximum of 24 months (two years). After two years, if you wish to continue using it, you’ll need to reapply for the password—a security measure implemented by Microsoft. Note that this password will only be displayed once. If forgotten, you’ll have to reapply for the application. Therefore, it’s advisable to record this password in a secure location.
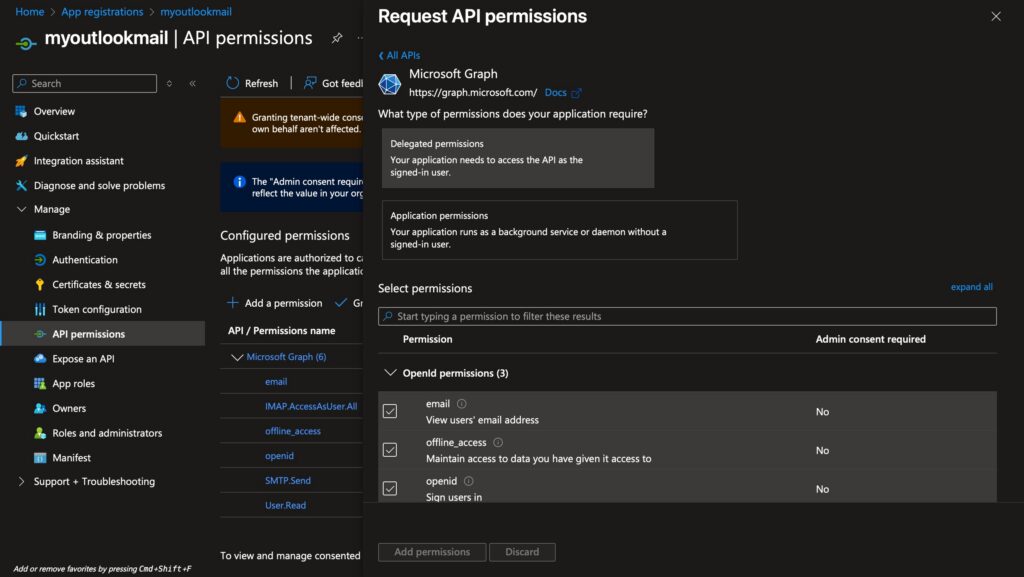
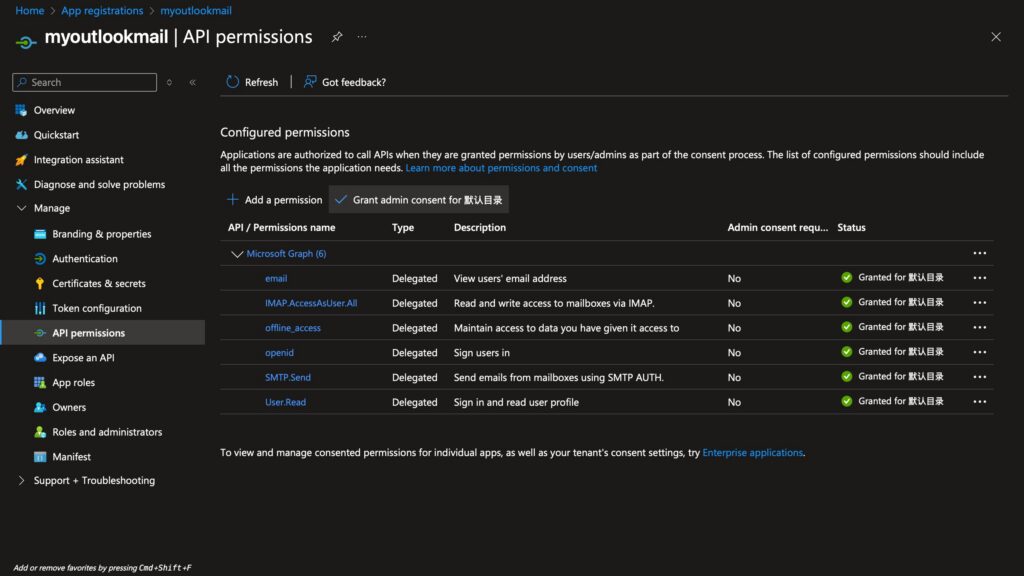
After obtaining the password, select the API permissions on the right. Then choose Microsoft Graph and select Delegated permissions within it. Check the boxes for IMAP and SMTP. After adding them, click Grant admin consent, which represents the default directory.
Then, in the third-party application or app you use, simply add the corresponding application tenant account and password.
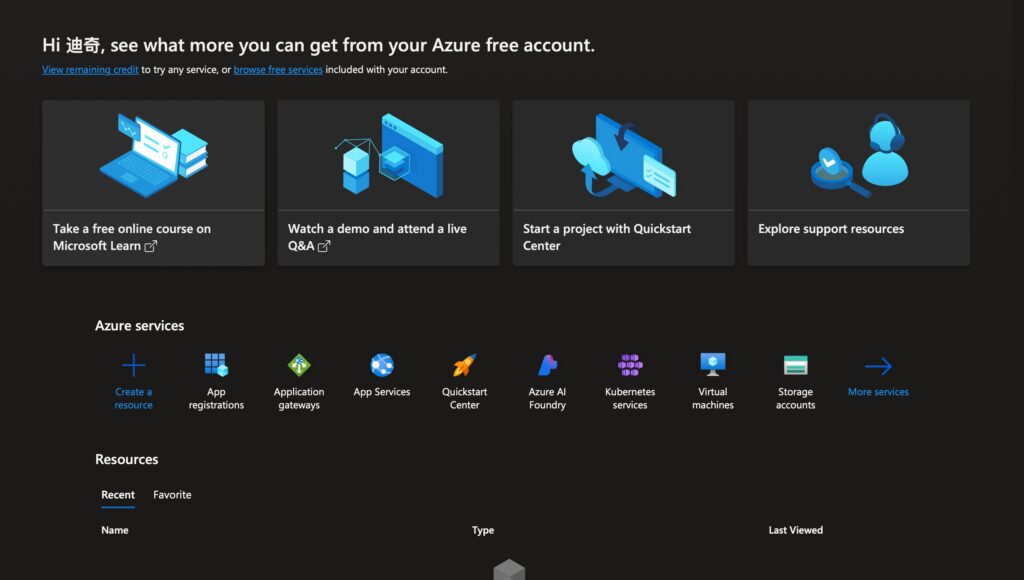
On your Azure personal homepage, you can view your current subscription plan. Mine is the free tier. Clicking “Details” shows which services are included at no cost. If you need to set up a simple website or personal application, you can fully leverage these resources.